In 2D or 3D view mode, you can apply a filter to a view to display only the features you want. With the Filter Features tool, you can create expressions—from simple to highly complex—to define your filtering criteria.
To Apply Filters
- Click the Filter Features tool on the toolbar
 ,or select Tools > Filter Features from the menu bar.
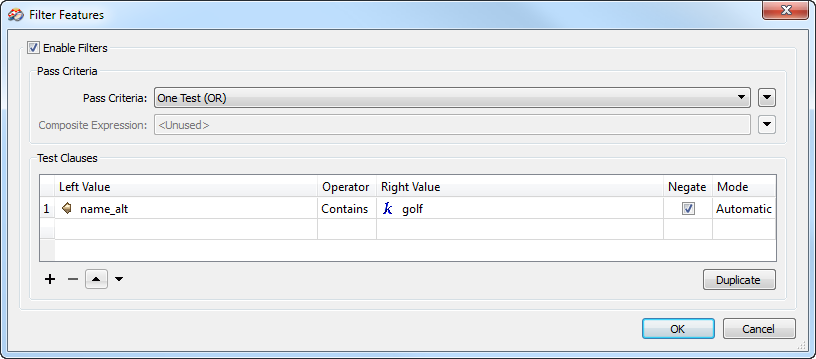
 - On the Filter Features dialog, check Enable Filters, and specify the following:
- Pass Criteria - If your filter contains more than one test clause, this value determines how the data is filtered in the final results, based on the results of each clause. You can specify OR, AND, or create your own expression from a composite of AND and OR operators.
- Test Clauses - The filter criteria expressions. The Filter Feature dialog provides a variety of operands for building expressions, along with a set of functions you can perform on feature attributes to further refine your expression.
- Click OK.
For a detailed description of the fields in the Filter Features dialog, see Filter Features Dialog.
To Remove Filters
- Click the Filter Features tool on the toolbar ,or select Tools > Filter Features from the menu bar.
- On the Filter Features dialog, uncheck Enable Filters.
- Click OK.
Example: Apply a Simple Filter
In the following example applied on a dataset of city parks, a filter is created to prevent golf courses from being displayed in the Data Inspector. The filter tests the name_alt attribute of features in the city_parks feature type to determine if it contains the string "golf." If it does, the feature is filtered out and not displayed.
Example: Create a Filter from a Composite Expression
The following filter is used to display only properties that are located in ZIP code 78752, and that are zoned for either single family residential (type=SF) or multi-family residential (type=MF) use.
