Adding Readers
You can add one reader, or specify multiple datasets to include as multiple readers.
Adding a Reader
- Select Readers > Add Reader. Alternatively, use Quick Add.
- Browse to the dataset file (or group of files) that you want to add. FME can usually determine the format from the file extension, and will automatically populate the Format field.
- Specify parameters and coordinate system (if applicable).
Selecting a Dataset from the Web
You can connect to a URL or a supported web service to access the dataset to read. From the Dataset pull-down menu, choose Select File From Web.
- To select a dataset directly from a URL, choose Specify URL. In the Dataset field, complete the URL to the dataset.
- To select a dataset from a supported web service, specify Browse and the web service to connect to locate the file. In the Select file dialog, you can specify an existing web connection, or create one and use it right away. For more information, see Using Web Connections. Under Choose File, select one or more data files. Depending on the web service, you can apply a search filter or specify a path or folder to locate files. When finished, click OK.
Workflow Options

Workflow options determine the number of feature types that will be displayed on the canvas. Selecting either one will not affect the outcome of the workspace: these options determine only how the feature types appear on the canvas, and how they are interpreted within the workspace.
By default, the Individual Feature Types option will be selected. This means that for every feature type in the dataset (assuming there is more than one), Workbench will display a corresponding feature type on the canvas. This has always been the default workflow for Workbench and for most workspaces, this option is sufficient.

If, however, you want to display only one feature type on the canvas, you can select Single Merged Feature Type. All feature types in the source dataset are merged into one single feature type.

Note: If you want to separate the feature types later, you can do this through the Feature Type dialog.
Initiating the Action
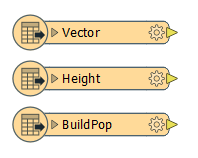
After you press OK, the log window will display processing information, and the feature types will appear in the reader area of your workspace.
Adding Multiple Readers
There are a few ways that you can create a workspace with multiple readers.
If readers are the same format and schema:
- Select multiple files when you create a new workspace. When specifying a dataset, click the Advanced Browse button
 .
. - Double-click the source (reader) dataset parameter in the Navigator pane, and click the browse button
 to select
multiple files.
Add Files: Opens the file browser. You can select individual files, or Ctrl + click to select multiple files.
Add Folders: Opens the file browser so you can select entire folders to add to the reader. All files that are in the specified format in those folders will be included.
Subfolders: If there are subfolders below the initial dataset location, check the box to include them.
Identical Schema Check this box if you know that all the files have the same schema. This is a time-saving function: there will be no difference in the workspace results. If you know the files have the same schema, FME will not have to perform an initial scan of all the files to determine their schema. Instead, FME will take the first file as being representative of the data model.
To add readers of differing format and schema, or readers of the same format and schema but for which other dataset settings need to be different, select Readers > Add Reader from the menu bar.