FME Form: 2024.1
Creating a Custom Transformer
FME Hub contains a library of custom transformers that are available either for free or licensed purchase. FME Hub is always updated as new transformers are added, so we recommend checking back periodically to see what's new.
The easiest way to create a custom transformer is from an existing workspace, and by choosing transformers that you are often reusing, or transformers that take up a lot of space on the canvas.
- Open a workspace.
- Select a group of transformers: click and hold the left mouse button, and drag a box around the transformers. Release the mouse button.
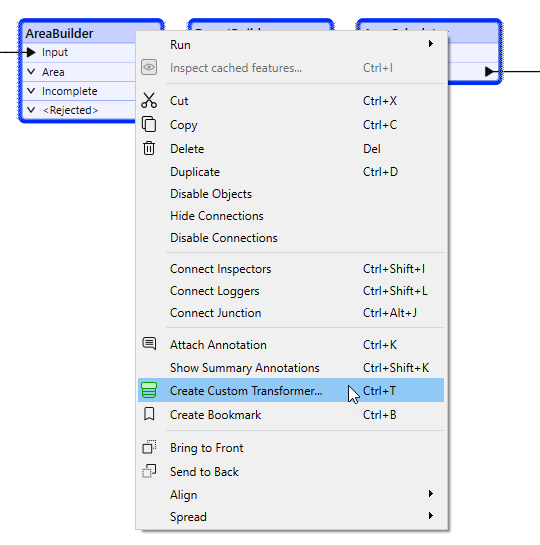
- Press Ctrl + T, or right-click and select Create Custom Transformer.
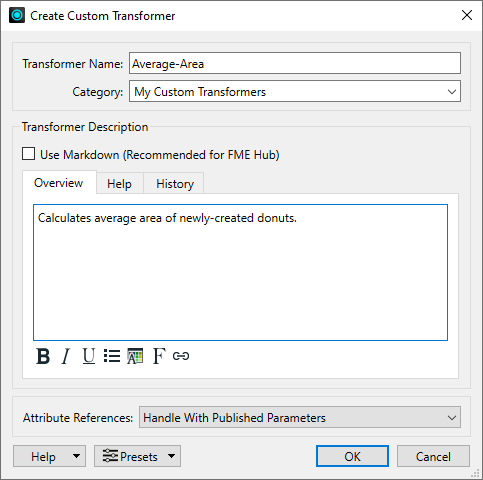
- In the Create Custom Transformer dialog, enter parameters for the custom transformer.
- Handle With Published Parameters: FME automatically creates published parameters, and sets their values, for each attribute used in the custom transformer. These attributes are passed into the input port of the custom transformer. This option is recommended because it prevents you from having to define input attributes each time the custom transformer is reused in another workspace.
- Advanced - Fix Manually: FME does not create any published parameters for attributes that are required by the custom transformer. To ensure the custom transformer is equipped with any attributes it needs to perform its function, you must add them manually. For more information, see:
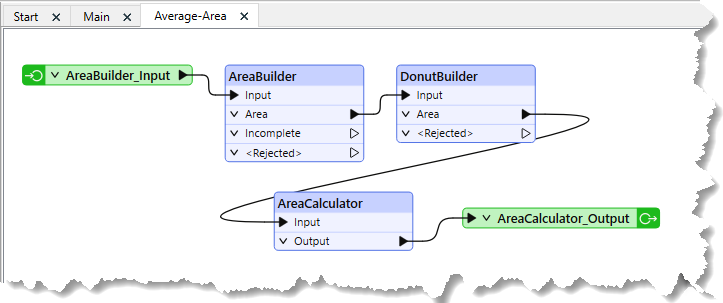
- Click OK. In this example, FME Workbench opens a new tab named Average-Area and the original group of transformers is shown on the canvas.


You can also enter other optional information, including a description. For information about entering an extended description, see Workspace Parameters.
Attribute References

The input and output (if included) arrows are for reference only, to reflect the input/output to the custom transformer in the main workspace.

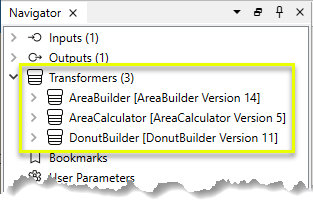
When the custom transformer workspace tab is selected, the Navigator lists the transformers (and their attributes) that are part of the custom transformer.

In the main workspace, the custom transformers, and their own parameters, are listed in the Navigator (much like any other transformer), except they appear as green icons:
![]()
Other Ways to Create Custom Transformers
- Right-click in your main workspace and choosing Insert Custom Transformer. You can build the transformer workflow separately, and then manually connect it to both the input and output transformer arrows, and in the main workspace.
- Create a bookmark and turn its contents into a custom transformer.
Embedded or Linked?
Custom Transformers can be defined in two forms: embedded and linked.
Embedded is the default state of a Custom Transformer when it is created. This means that the transformer is stored as part of the current workspace. It is not available to other users and cannot be used in other workspaces.
A linked transformer is one whose definition is exported as an external file. Each reference to the transformer from a workspace is a link to that definition, and if the definition changes, then so does the workspace behavior.
For more information, see Embedding or Linking a Custom Transformer.
What can you do with a custom transformer?
After you have created a custom transformer, you can:
- Edit its definition in separate tabbed window
- Duplicate it (copy/paste it) within the same workspace
- copy/paste it into a new workspace (its elements are also copied)
- Export it as a separate .fmx file
(by default, it is stored in My Documents\FME\Transformers) After you export it, you can:
- select a linked transformer from the Transformer Gallery, and include it any number of times.
- Share it with other users.