You can enable a background map to open when you view data. This allows you to overlay your own data and view it relative to a specific location.
When the background map feature is enabled, both the dataset you open and the background map dataset appear together in the View window and the Display Control window.
For example, if you have a dataset that contains the roads in a specific city, you can overlay this data1 Background Maps: ArcGIS Online: Sources: Esri, DeLorme, NAVTEQ, USGS, Intermap, iPC, NRCAN, Esri Japan, META, Esri China (Hong Kong), Esri (Thailand), TomTom, 2013 MapQuest: Tiles Courtesy of MapQuest Stamen: Map tiles by Stamen Design, under CC BY 3.0. Data by OpenStreetMap, under CC BY SA. onto a background map of the same area:
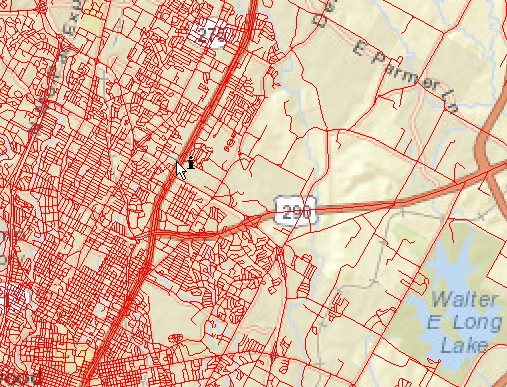
Only features of the dataset you open can be selected for viewing in the Feature Information window or Table View. You cannot zoom in or otherwise change the view of the background map: the focus is always on your own data.
Note: Data is reprojected to the coordinate system of the background map. Therefore, coordinates that appear in the Status Bar are in the same coordinate system as the background map data. Coordinates in the Feature Information Window remain in the original system of the dataset being viewed.
How to Enable a Background Map
From the menu bar, click Tools > FME Options. This opens the FME Options window.
From the left sidebar, select Background Map.
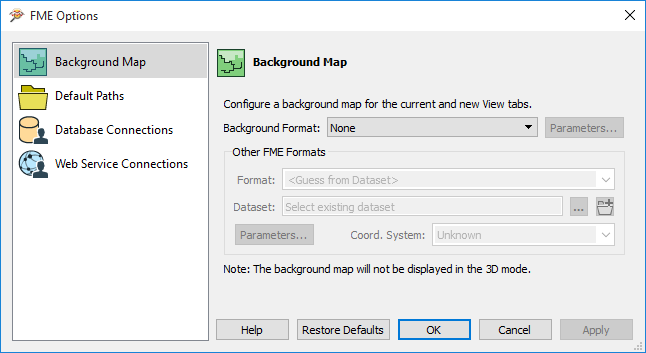
Background Format
| Option | Description |
|---|---|
| None |
This option disables the background map. You can use this option to toggle the background map on and off. |
|
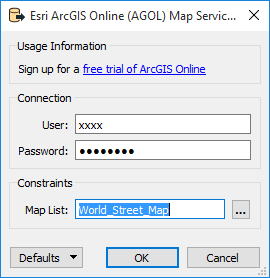
Esri ArcGIS Online (AGOL) Map Service |
Click the Parameters button to open the connection dialog.
If you already have an account, enter the account credentials. If you do not have an account, follow the link in the dialog for a free trial of ArcGIS Online. Constraints: Click browse to open a list of available maps (you can filter the list to narrow the choices). Select a map and click OK to accept the selection. The selection displays in the Map List field. Click OK to close the dialog and accept the selection. |
| Microsoft Bing Maps |
|
|
MapBox Web Map Tile Service |
|
|
MapQuest Web Map Tile Service |
Click the Parameters button to open the connection dialog, and browse to the map you want to load. Click OK to accept the choice and close the window. Note that you do not need an account to access MapQuest Web Map Tile Service. |
| Nokia Here Map Service |
|
|
Stamen Maps |
Click the Parameters button to open the connection dialog, and browse to the map you want to load. Click OK to accept the choice and close the window. Note that you do not need an account to access Stamen maps. |
| WMS (Web Map Service) |
Click the Parameters button. In the parameters dialog, specify the URL of the map server you want to access. If the specified server requires authentication, check Use Network Authentication, and specify the authentication method and credentials, if applicable. Specify Constraints, Map Options, Schema Attributes, and Search Envelope parameters as desired. For more information on these parameters, click Help in the parameter dialog. |
|
Other FME Formats |
The format prompt allows you to pick any dataset as a background map. This option is best if you already have data that can be used in this scenario. Select a format and dataset to be used as the background map. (Optional) Parameters: Specify any format-specific settings that may be relevant to accessing or rendering the data. If you don't change these parameters, in most cases, FME uses preset default settings. (For detailed information on format parameters, click the Help button on the parameter dialog.) (Optional) Coord. System: Specify an alternate coordinate system to project the background map. |
To initiate the background map view, click Apply to save the selection, or OK to save the selection and close the FME Options dialog.