Drag and Insert
Using the Drag and Insert Transformer function is one of the easiest ways to insert and connect transformers into an existing workspace. It virtually eliminates the need to manually re-establish connections. This is especially useful in large workspaces, if you want to insert a transformer in the middle of many already established connections.
Enable/Disable Drag and Insert Transformer

Disabling this function might be useful in large workspaces to avoid inadvertently creating unwanted connections.
Inserting a Transformer: Existing Connection
You can "drag and insert" a transformer onto an existing connection. The connection will turn green.

Release the transformer to set its place.

If either object has multiple input or output ports, you will be prompted to choose how to set the connections.
Tip: You can change the default port for the automatic input and output connections. See Transformer Options.
Setting Multiple Connections
You can also insert into multiple existing connections. Drag a transformer over a port (shown highlighted in pink), and drop it into place.

Release the transformer to place it.

Note: Reversing the Insertion Point: Sometimes it can be difficult to drop a transformer into the required position because the body of the transformer can hide the connection or port into which it needs to be inserted. You can sometimes work around the problem by pressing the ALT key when you are dragging the transformer. This causes the insertion highlight point to be switched to the opposite corner of the transformer, making it possible to highlight the required port without blocking it from view.
Changing Connections after Drag and Insert
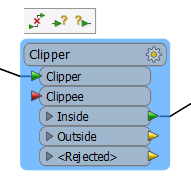
Upon auto-connecting a transformer, a connection toolbar appears above the transformer  . If you wish to remove connections while keeping the transformer on the canvas, click Undo Automatic Connection
 ![]() . To undo, add, or change input port connections, click Reconnect input port
. To undo, add, or change input port connections, click Reconnect input port ![]() . To undo, add, or change output port connections, click Reconnect output port
. To undo, add, or change output port connections, click Reconnect output port ![]() . The connection toolbar disappears when focus shifts away from the transformer.
. The connection toolbar disappears when focus shifts away from the transformer.

Inserting a Transformer: Separate Connections
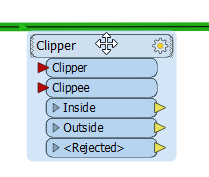
You can connect a single transformer into multiple input ports that require separate connections. A Clipper transformer, for example, has multiple input ports that require separate connections.
The first connection is easy. When you place the transformer over the connection, the connection toolbar allows you to set specific ports. Click the input and output buttons and then select the ports from the list of ports that appears above the button:

Dragging a transformer that is already inserted still causes a highlight point to appear, and connections to be highlighted. You can make a second insertion with the same transformer, but onto the additional link. Again, use the connection toolbar to set the ports:

Note: You cannot insert a transformer in a position that would cause a loop in the workflow – any invalid connections will not even be highlighted.
SourceSansPro-ExtraLightItalic.ttf