Defining the Writer
In the destination area of the Set Translation Parameters dialog, select a writer format and enter a dataset name.
WARNING: If you enter an existing filename, the existing file will be overwritten. FME will not prompt you before overwriting a file.
Writer Parameters
Writer Parameter boxes allow you to specify additional information relating to some destination datasets. When you select one of these formats, the Parameters button will become available. When you click the button, you’ll see a dialog that contains options specific to the format you selected.
If the format doesn’t support any special settings, then the button will remain dimmed (and unavailable).
Note: Note: You don’t have to change the settings if your destination format supports this feature – FME will simply use the default settings.
Help for Output Settings: When you open a settings box, press the F1 key for detailed help.
Refining the Translation in FME Workbench
After you have defined the reader and writer, you can choose to continue setting up your translation in FME Workbench. This means that you’ll be continuing the translation using Workbench’s user interface; you’ll get the same results, but you’ll produce them in a graphical environment.
Click the Refine Translation with FME Workbench button:
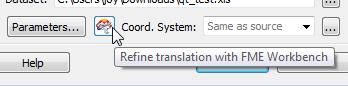
FME Workbench will start, and New Workspace dialog will be already populated.
Coordinate System
This field will usually display Same as source, which means that FME will use the same coordinate system as the source file used. In most cases, the default value is all you'll need to perform the translation.
For more information see:
Adding Custom Coordinate Systems
What's Next?
When you've finished specifying the destination information, you can create a custom mapping file.