The Schedules page allows you to run workspaces at specific times in the future on a repeating or non-repeating basis.
A request to run a workspace at a scheduled time is called a task. Each entry in the Schedules table represents a scheduled task. When a task is completed, its entry is removed from the table when the page is refreshed.
Tip As an alternative, consider using the Schedule trigger on the Automations page—an easy-to-use interface for creating workflows to run workspaces or complete other tasks.
Viewing Schedules
The Schedules page lists all the schedules created on the FME Flow, including those that have not yet run any tasks.
Tip (fmesuperuser role only) To include any schedules that originate from FME Flow Schedule triggers in Automations workflows, click Filter. On the Filter dialog, select Show Automations, and click Apply. To hide these schedules, click Hide Automations. The Automation must be running to appear here.
The columns displayed on the Schedules page are:
Note Some fields do not display by default. To control which columns display, click the Customize Columns icon.
- Name: The user-defined name of the task
- Category: The user-defined name of the general category or group to which the task belongs
- Start Time: The time at which the task is scheduled to start, using the following syntax:
- End Time: The time at which the task is to end. The time displays as N/A if the task does not end, or using the following syntax:
- Recurrence: The frequency of the task. Recurrence displays as, Never (if the task occurs only once), a Cron expression, or the recurrence interval, whichever is specified.
- Workspace: The workspace that runs the request.
- Status: The current status of the task.
- Enabled (green checkmark): it will run at the next scheduled time.
- Disabled (red circle with x): the task has been paused.
- Owner: The user who created the schedule owns it and has full permissions on it.
- Share: To share a schedule, click the Share with Others icon. Through sharing, you can grant levels of permissions on an item to other users. You can share an item if you own it, or if you are a user with Manage permission in Security, such as an administrator. For more information about sharing and ownership, see Role-Based and User-Based Access Control.
year-month-day hour:minute:second
year-month-day hour:minute:second
Note cron expressions display according to the time zone of the FME Flow that is running the task. All other times display in your local time zone.
- Average % CPU: Average percentage of processing time that is recorded as CPU time, calculated as Average CPU Time / Average Elapsed Time.
- Average CPU Time: Average total CPU time to run the workspace. For more information about how CPU Time is measured, see the Completed jobs table.
- Average Elapsed Time: Average total processing time of the workspace.
- Average Peak Memory Usage: Average peak memory usage by the FME Engine while processing a job. For more information about how Peak Memory Usage is measured, see the Completed jobs table.
You may decide that, over time, some of the performance-related statistics, such as those pertaining to CPU time and memory usage, are outdated and do not reflect current conditions. If so, you can reset them so that they are calculated anew. Select one or more schedules to reset, click Actions, and select Reset Statistics.
Adding a Scheduled Task
To add a scheduled task, do any of the following:
- From the Schedules page (Schedules > Manage Schedules), click Create; or, select a task from the table, and select Actions > Duplicate.
- Select Schedules > Create Schedule.
Enter or edit the following information to define the task. When finished, click OK.
Tip You can test a workspace that is initiated by a Schedule trigger, regardless of the times the Schedule is configured to execute. See Testing a Schedule-Initiated Workspace, below.
Name: Name of the task
Category: Name of the general category or group to which the task belongs.
This name can be used to organize tasks into site-specific types as required.
Task names must be unique within the table.
Description: Description of the task.
Enabled: Check to enable the task.
Schedule Type:
- Basic: The task repeats in a calendar-friendly selection of intervals derived from a specified start time.
- Repeat On Interval: The task repeats in intervals from a list of predefined units.
- CRON Expression: The task repeats based on your own cron expression.
- Only Occur Once: The task runs once only at the specified Start time
Note Basic and CRON Expression must be configured according to the time zone of the FME Flow that runs the task. All other times can be expressed according to your local time zone.
If Repeat on Interval is specified, the schedule does not adjust when switching between Standard Time and Daylight Saving Time.
| Field | Required | Allowed Values | Allowed Special Characters |
|---|---|---|---|
| Seconds | Yes | 0-59 | , - * / |
| Minutes | Yes | 0-59 | , - * / |
| Hours | Yes | 0-23 | , - * / |
| Day of month | Yes | 1-31 | , - * ? / L W |
| Month | Yes | 1-12 or JAN-DEC | , - * / |
| Day of week | Yes | 1-7 or SUN-SAT | , - * ? / L # |
| Year | No | empty, 1970-2099 | , - * / |
For more information about the cron format, see this FME Community article.
Date Range:
- Start: Date and time the task is to start. For more information, see Specifying a Future Time.
- Start Immediately: When checked, the task starts as soon as it is added to the Schedules table. When unchecked, you must specify a Start time (above).
- End: Date and time to stop running the task. For more information, see Specifying a Future Time.
- Does Not Expire: When checked, the task has no end time. When unchecked, you must specify an End time (above).
Recurrence: If Schedule Type is Basic, specify how often the task repeats from the drop-down selections.
Skip if Job In Progress: If checked, and Schedule Type is Basic, Repeat on Interval or CRON Expression, the next scheduled task is not triggered if the status of the previously triggered job is still Running or Queued.
Tip You can check a job's status on the Jobs page.
The following example shows a recurring task entry in the table:
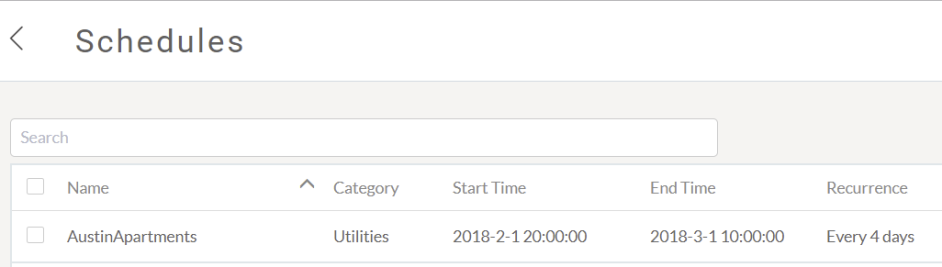
In this example, the task recurs every four days starting on 01-Feb-2018 at 8pm and ending on 01-March-2018 at 10am.
Workspace
Repository: Name of the repository in which the workspace resides.
Workspace: Workspace the task is to run.
Once the workspace is specified, any published parameters of the workspace display. You can modify these parameters, if desired. The changes take effect when the task is run.
Notifications
If desired, specify the Notification Service topics to which to send a notification if the task executes successfully (Post to Topic on Success) or unsuccessfully (Post to Topic on Failure). For more information, see Monitoring FME Flow Events from Topics.
Advanced
- Job Queue (optional): The queue in which to run the job. The specified queue overrides the queue that would otherwise be assigned based on Queue Control job routing rules. If not specified, job routing rules apply. To view the queues to which FME Engines are assigned, open the Engines page.
- Queued Job Expiry Time (optional): The length of time after which a job that is waiting in queue does not execute. If the job does not execute before this time is reached, it remains in the queue until it is ready to execute, but execution is not attempted. This directive is useful for time-sensitive jobs that you do not want to run after the specified time is exceeded.
- Running Job Expiry Time (optional): The time a job will remain in the running state. This directive is used to ensure that a job does not hang and block an FME Engine indefinitely. The minimum allowable value is 1.
Testing a Schedule-Initiated Workspace
For testing purposes, you can force a workspace that is initiated by a Schedule to run at any time, regardless of the specified parameters of the Schedule.
From the Schedules Page
- Select the schedule that initiates the workspace you want to test.
- Select Actions > Trigger.
From the Create or Editing Page of an Individual Schedule
- When ready to test, click Trigger (at bottom).
A Trigger Schedule message displays to indicate whether the Schedule was successfully requested. If so, the scheduled task runs as it is currently configured.
Viewing Jobs Triggered by a Schedule
To view a list of jobs that have been triggered by a schedule, select a schedule, and select Actions > View Triggered Jobs.
Click on any job in the list to view it on the Jobs page. To remove a job from the list, select it and click Remove.
Modifying a Scheduled Task
To examine or modify the properties of a scheduled task, click the task entry in the Schedules table.
This displays the properties of the task in a page similar to the one used for Adding a Scheduled Task, above. If the schedule originates from a FME Flow Schedule trigger in an Automations workflow, the workflow opens for editing.
Enabling or Disabling Scheduled Tasks
You can suspend scheduled tasks when they are created or by modifying an existing task. Click the Enabled check box in the Editing Schedule or Create a New Schedule page. Alternatively, on the Schedules page, select the tasks you want to enable or disable (suspend), and select Actions > Enable or Disable.
Removing a Scheduled Task
To remove a scheduled task, check the box beside the task on the Schedules page, and select Actions > Remove.
Note Removing a scheduled task while its workspace is running does not interrupt the associated translation — the translation is not affected by task removal and will run to completion. Removing a task only prevents the subsequent running of its associated workspace.