FME Form: 2026.1
To query a feature in 2D or 3D view mode, click Select on the toolbar, then click on a location in the View window. To select more than one feature, click and hold the left mouse button, then drag the cursor around the desired area.
Note Selecting features in 3D mode works in a slightly different way: when you click on a feature in 3D, the tool will select all the features along an imaginary line that goes straight through the View window. In other words, it will also select all the features located directly behind the one that you click on.
To query a feature in table mode, select a row from the table. To select more than one feature, click on a row and drag the mouse up or down. To select all features, click on the upper left corner of the table.
Information about the feature(s) displays in the Record Information window.
If multiple features are selected, the feature whose information is currently displayed in the Record Information window is highlighted.
Clicking the arrow beside a section name expands/collapses the information in that section.
Raster datasets display additional information that includes row/column, location, band and palette properties, and palette keys and values.
Viewing Large Values
Some attribute values may be truncated because they are too large to display in the Feature Information window. Double-click on any value to display it in full in a separate window. There are several display and search options at the bottom of the Value window. Mouse over each option to display its description.
Features Selected
Displays the number of features that have been queried in the View window.
You can use the arrows to scroll through these features or enter a number into the text box to view information for a particular feature. When the text box has focus, you can also use the Up arrow key on the keyboard to increase the text box number, and the Down arrow key to decrease the text box number. When the text box does not have focus, you can scroll through features using Ctrl + left and Ctrl + right on the keyboard.
Saving Data
You can use standard operating system functions to select any entries in the Feature Information window, contiguous or non-contiguous. After selecting, right-click and select Copy Text or Copy Text With Indentation. Copied text can then be pasted into a separate application.
Copy Text: Copies selected text, excluding any whitespace characters.
Copy Text With Indentation: Copies selected text, including any whitespace characters. Use this option when you want to attempt to preserve indentations or columns when pasting into a spreadsheet.
Alternatively, you can output all the data about a feature in the Feature Information window to the Log window, then save to a text file. Click anywhere in the Feature Information window, and select Log This Feature.
Searching Data
To search for information, use the Search bar, at bottom, and specify the column (or any column) you want to query. You can query using any part of the value from the specified column(s).
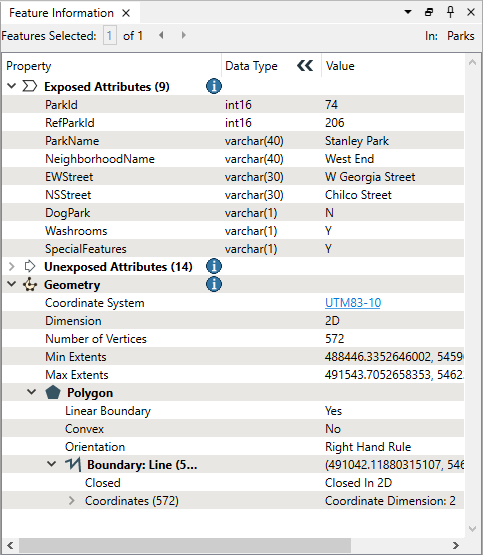
Exposed and Unexposed Attributes
This section displays all the attributes and attribute values of the currently selected feature.
For more information, see Understanding Feature Types and Attributes.
Geometry
This section displays all the geometry information for the currently selected feature, including the name of the FME Geometry Type to which the feature belongs.
Shown here are:
- The local coordinates of the bounding box (or cube in a 3D dataset) of the currently selected feature
- A full listing of all geometric information for the feature (coordinates for all geometry types, information about measures, transformation matrixes, raster bands, and so on).
Coordinate System: Displays the coordinate system of the selected feature, or Unknown if the format does not support coordinate systems. Click the link to display detailed information about the coordinate system:
This area also contains information about whether the feature is 2D or 3D, the number of vertices in the feature, and minimum and maximum bounding box values of the selected area.
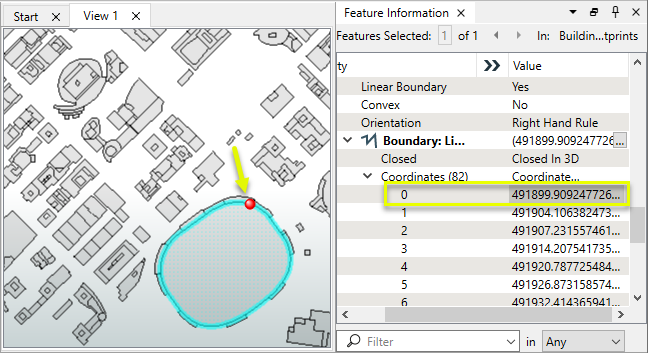
Tip If you click on the coordinates of a point listed in the geometry section of the Information window, the point is marked in the View window. You can also choose to display coordinates and text insertion points in the View window.