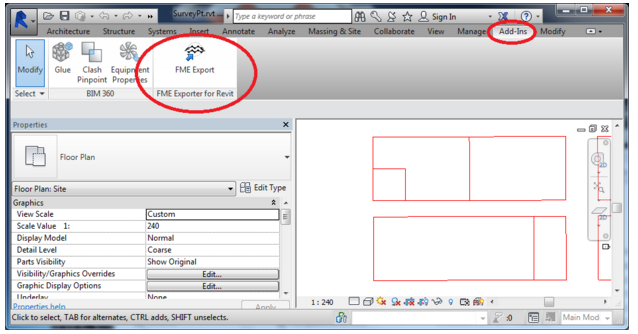
FME Exporter for Autodesk Revit
Installing the plugin
The plugin should be automatically installed when you install 64-bit FME, or the standalone FME Exporter for Revit (https://www.safe.com/solutions/for-applications/autodesk/revit/download/).
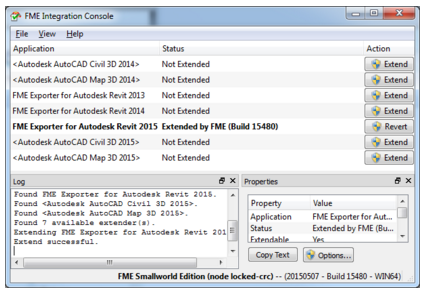
If you installed 64-bit FME, but the FME Export plug-in does not appear in Revit, you may need to manually extend it. To do this, start the FME Integration Console application from the Windows Start menu.

If the status of the FME Exporter for Revit is Not Extended, click the Extend button to the right. If the Status is Extended, click the Revert button to the right, then the Extend button to re-extend it.
Using the FME Exporter
After starting the FME Exporter, the Export dialog will appear. The FME Exporter is essentially an extended version of the Revit IFC Exporter, so the dialogs are identical. The Exporter offers a selection of pre-built setups to choose from.
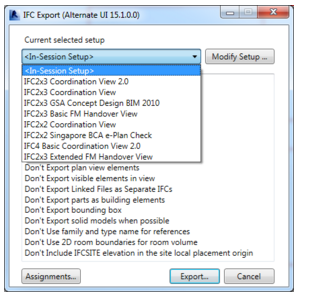
To use your own settings, choose <In-Session Setup>, then click the Modify Setup button.
For more information on this dialog, see the Autodesk Help (http://help.autodesk.com/view/RVT/2015/ENU/?guid=GUID-14037C31-EBAD-41A8-9099-E6DD65BB626E)
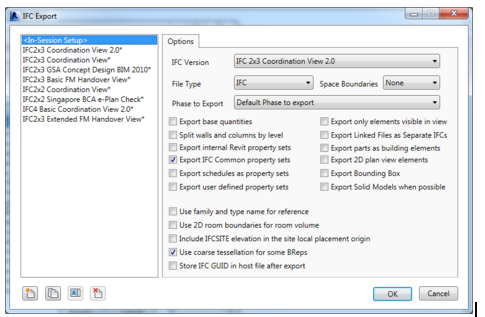
For most conversions, we recommend:
- IFC Version: FME can read both IFC 2x3 and IFC4
- File Type: IFC
- Space Boundaries: 1st or 2nd Level
- Phase to Export: Default Phase works in most cases, but you may need to explicitly choose a phase to get all of the project.
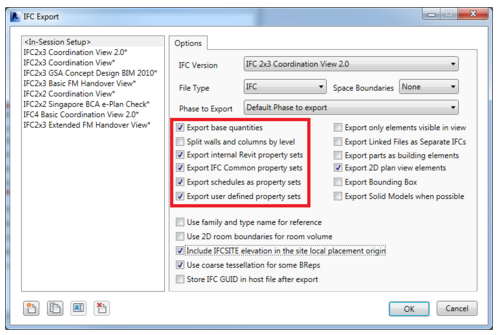
- Base Quantities and Property Sets: Check all.
- Split walls and columns by level: Check if you will be using the Floorplan data view in the FME Revit reader. Leave unchecked for other data views.
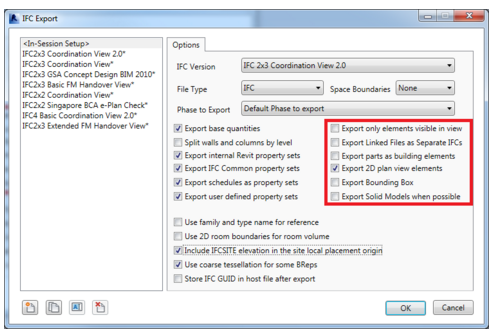
- Export 2D plan view elements: Check if you will be using the Floorplan data view in the FME Revit reader.

- Include IFCSITE elevation in the site local placement: Check for better geo-referencing.
Once you have adjusted your setup, click the Export button and choose the output RVZ file location:
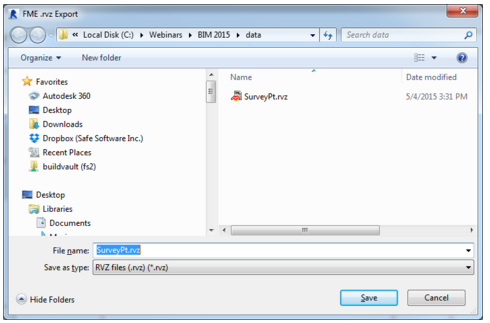
The file is now ready to import into FME.